How to use Azure checklists
You probably know what a checklist is. I define a checklist as a standard set of actions that have to be completed before the whole task can be marked as completed.
When companies are looking to create or migrate workloads to Azure, they may not be sure whether they have considered everything and are following Microsoft's best practices. For example, if you are deploying Azure VMware Solution (AVS), have you considered deploying extra storage like Azure NetApp Files as vSAN is a small finite resource or have you considered your ExpressRoute bandwidth sizing? These two examples are the elements you should consider during an AVS deployment, but they can be missed when designing the architecture of such an implementation.
But fear not, Azure Review Checklists are here to save the day 🦸♂️! These are freely available on GitHub and are managed and maintained by Microsoft: https://github.com/Azure/review-checklists
So how does it work?
Thankfully, it is pretty easy to use. Download the latest version of the checklist and open the Excel file. You need to enable Macros; otherwise the automation within the workbook does not work.
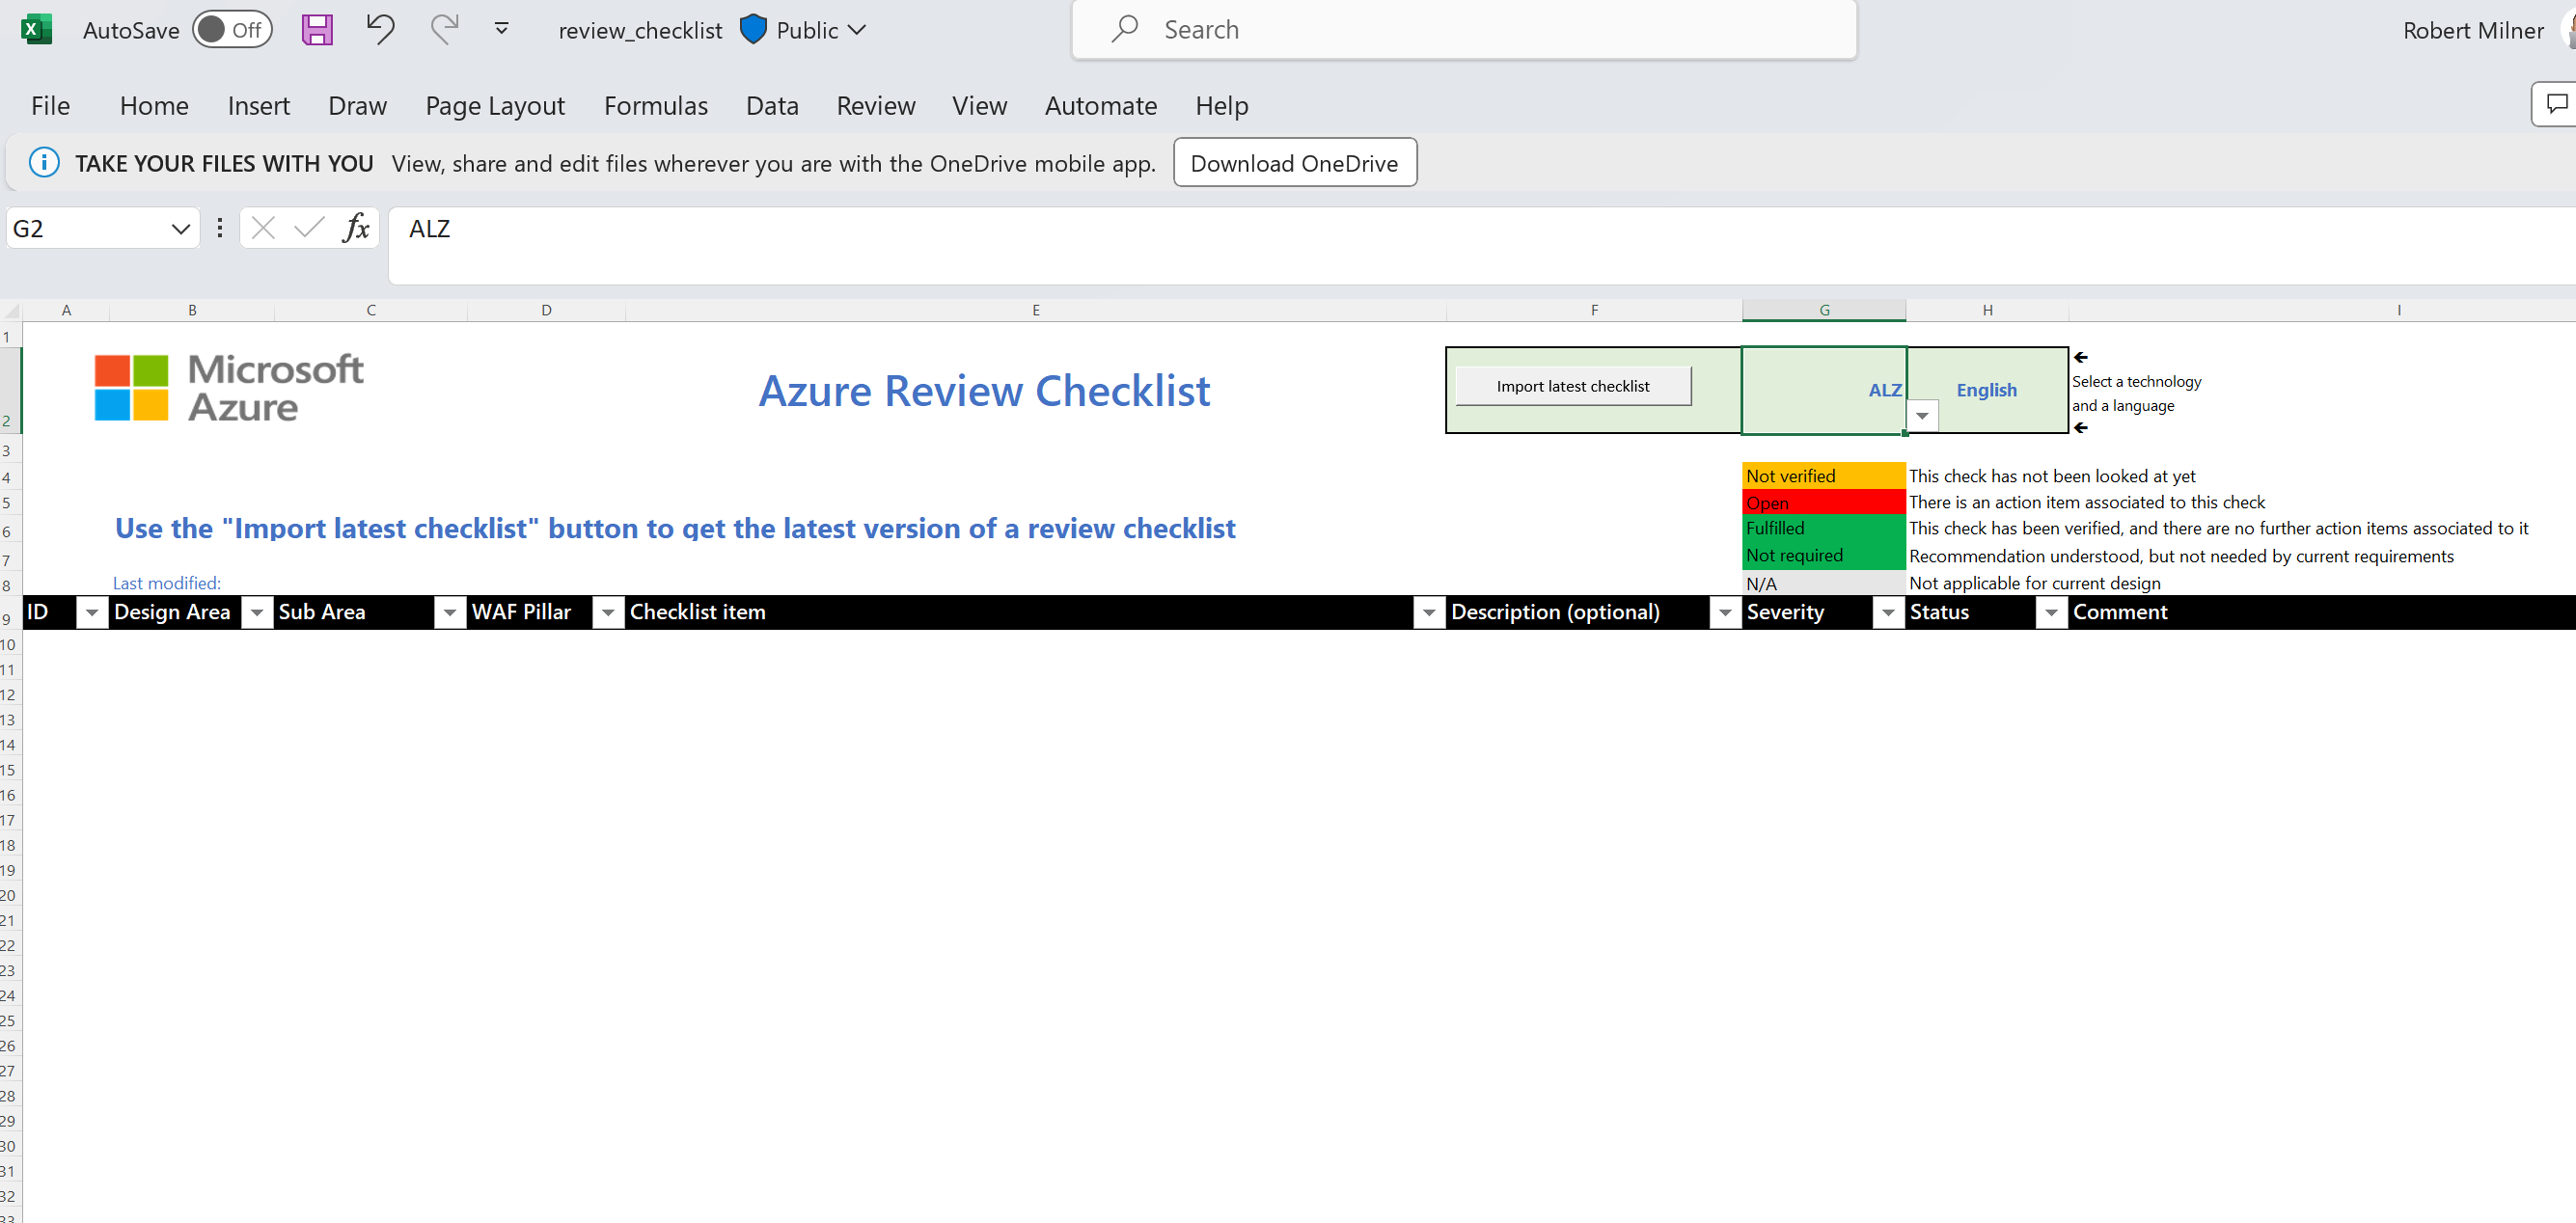
Upon opening the workbook, you will see that it is blank:
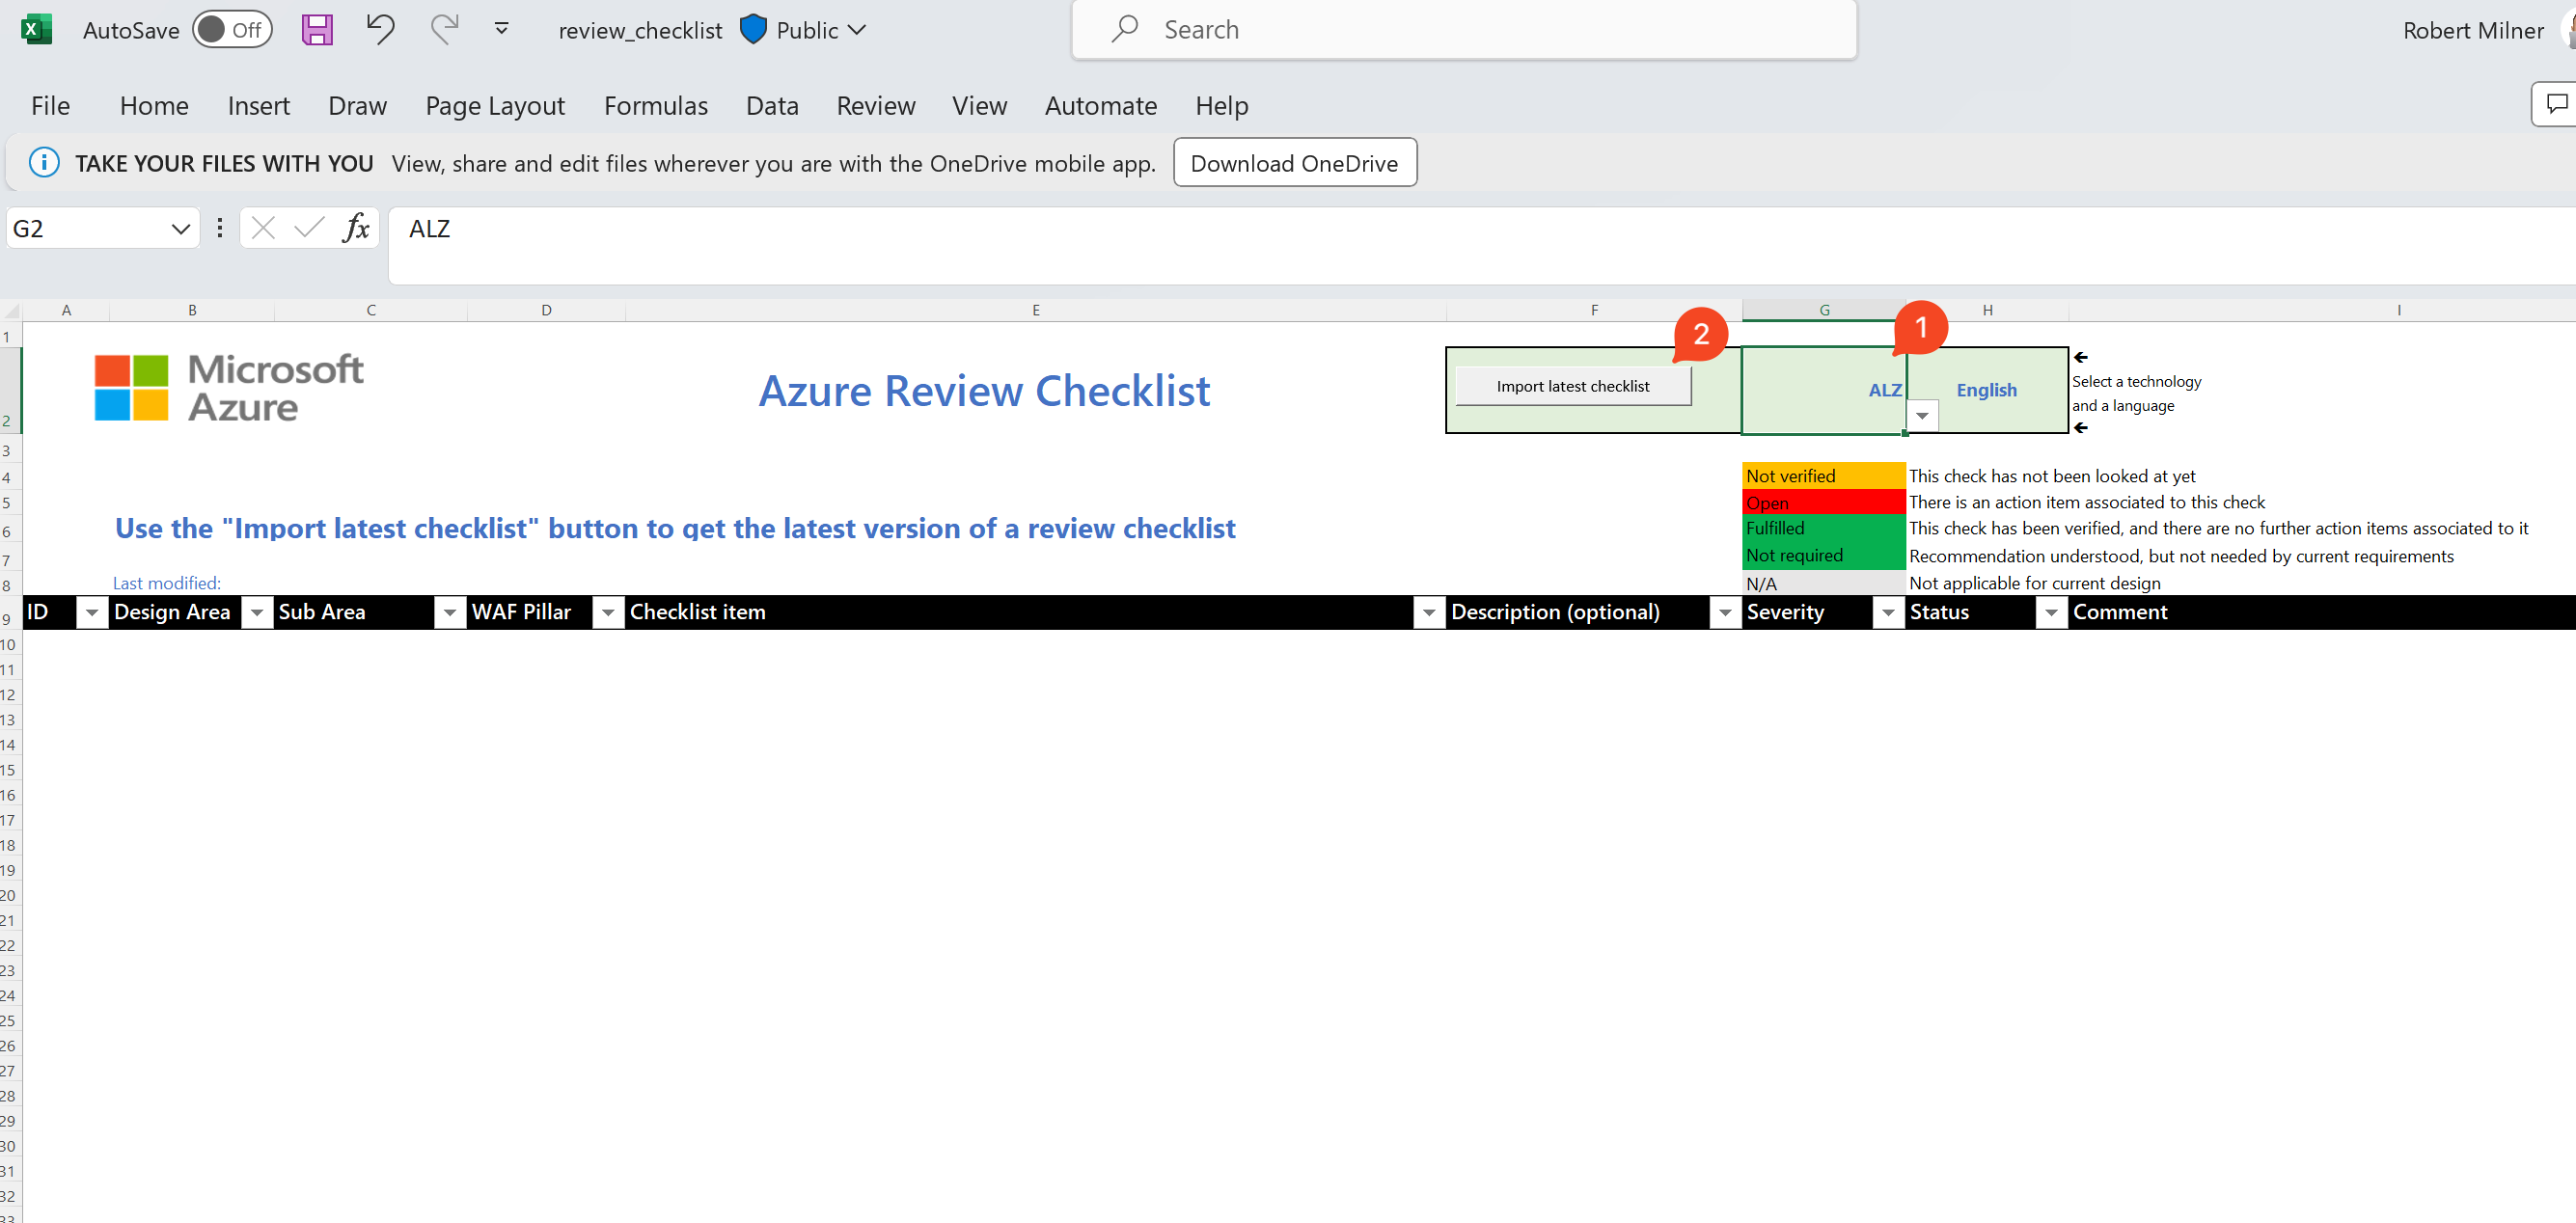
To import the checklist, you need to:
- Select the checklist type that you want to import
- Then press the Import latest checklist button
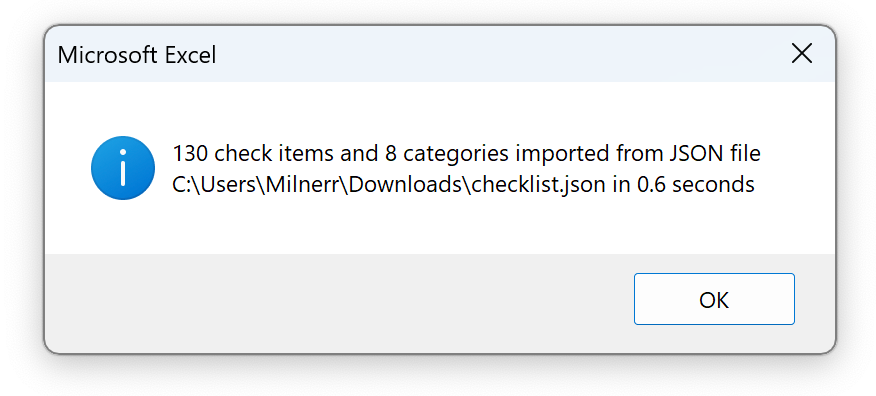
(For this post, I will import the AVD checklist as this is one I have used in the past). When you press the Import latest checklist button, a popup appears. Just press OK:
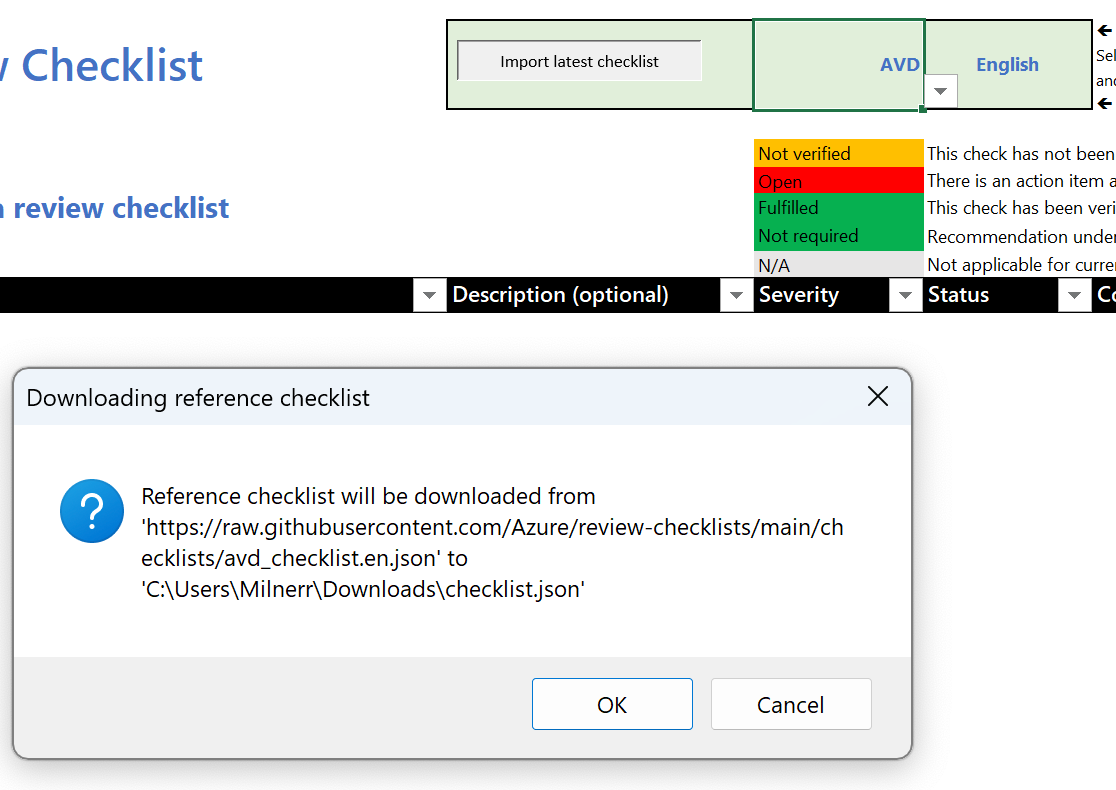
It downloads the checklist as a JSON, and once downloaded, you should get a confirmation that it has been downloaded successfully:
You should now see that the items from the checklist.json file have populated the spreadsheet. This now acts as the basis for your checklist.
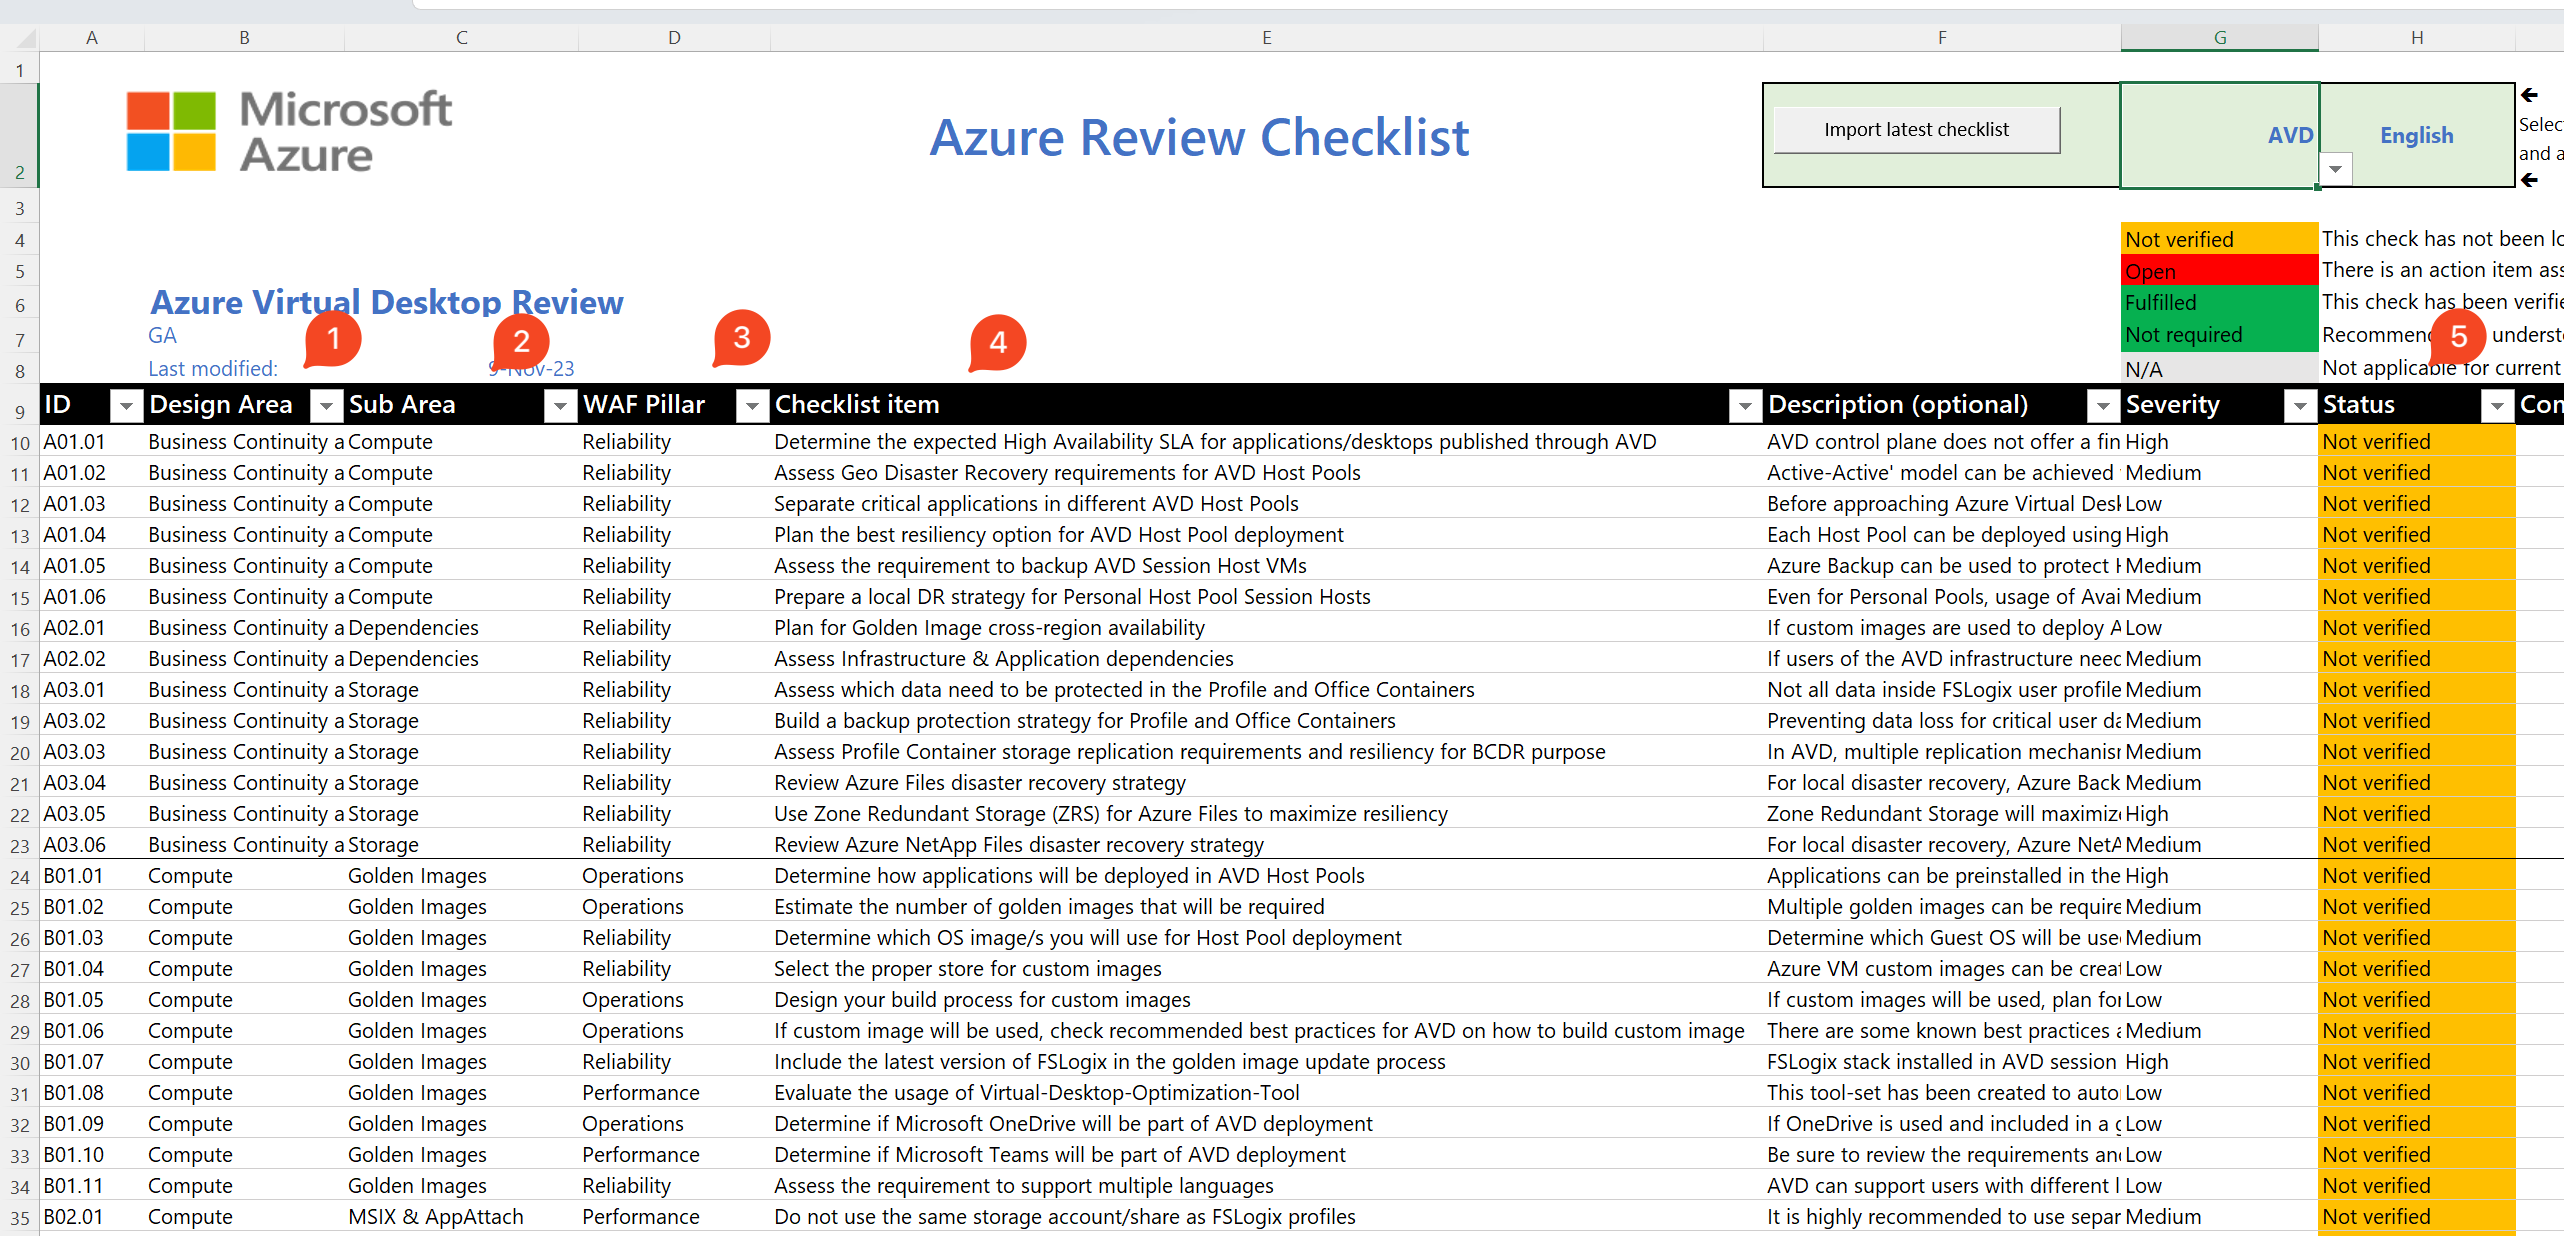
To explain the Excel file in some further detail now that we have a checklist imported:
- Design Area: The design area is the specific area that the checklist focuses on, which should hopefully make sense. E.g. Business Continuity design areas are items that focus more on BC/DR
- Sub Area: This is the area that the checklist item falls under
- WAF Pillar: This maps the checklist item to the WAF Pillar (separate post on that coming soon, but read here for more info on the Well-Architected Framework: https://learn.microsoft.com/en-us/azure/well-architected/)
- It is also worth noting that some Azure resources have their own dedicated WAF page so that you can architect them in the correct manner that meets the WAF pillars
- Checklist Item: This gives more information on the checklist item
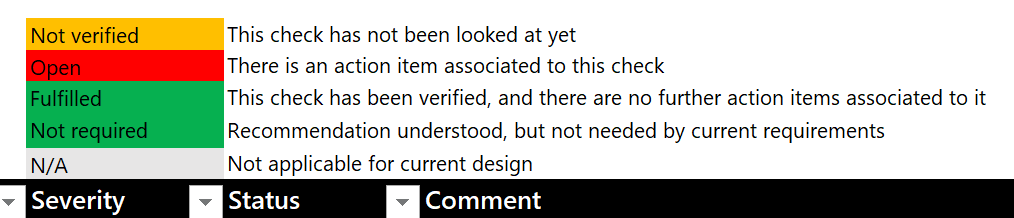
- Status: After reviewing the checklist item, you set the item's status to reflect how far you are with the design and implementation. There is an explanation on the spreadsheet for what the different statuses mean:
OK, let's do this thing!!
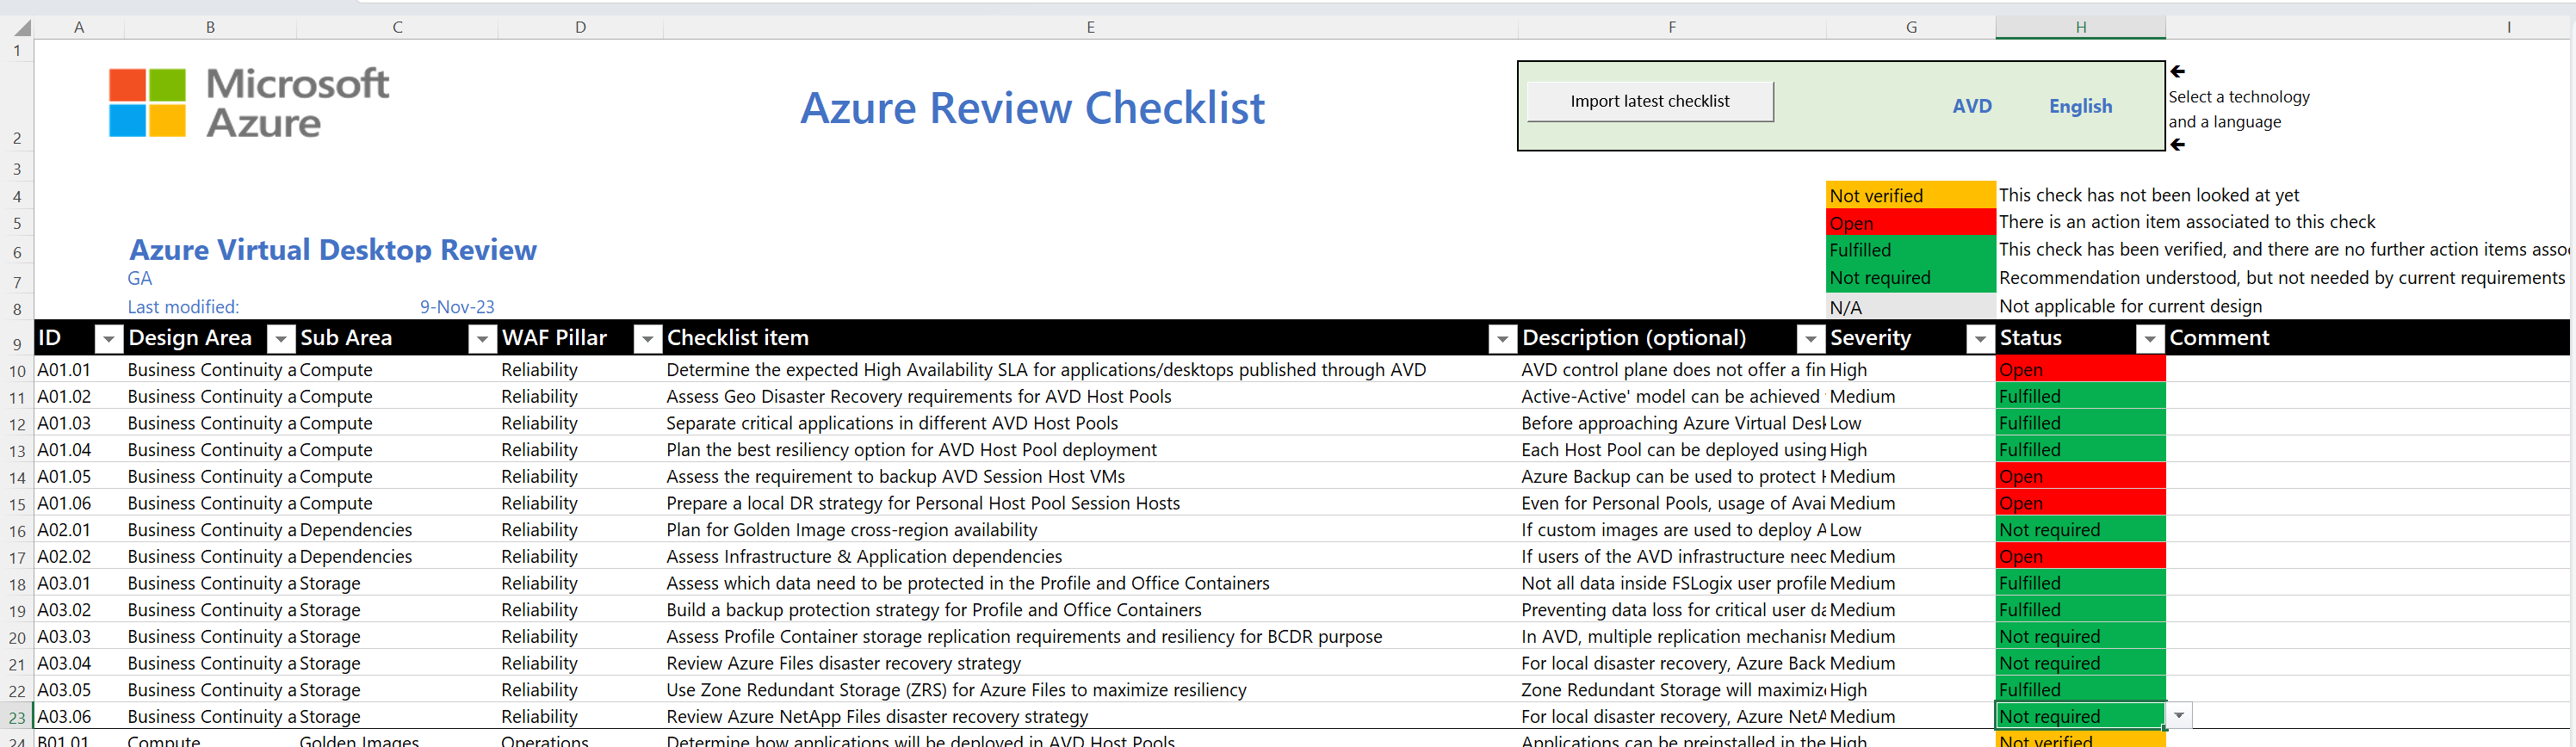
So now you are ready to review each item and set the status as appropriate 💪.
In the below example, I have started to fill in the Status column, and usually, I put in a comment so that the next time I open the checklist, I know why I chose that open:
Updating the status also reflects the Dashboard tab in the spreadsheet, with some nice graphs and stats:
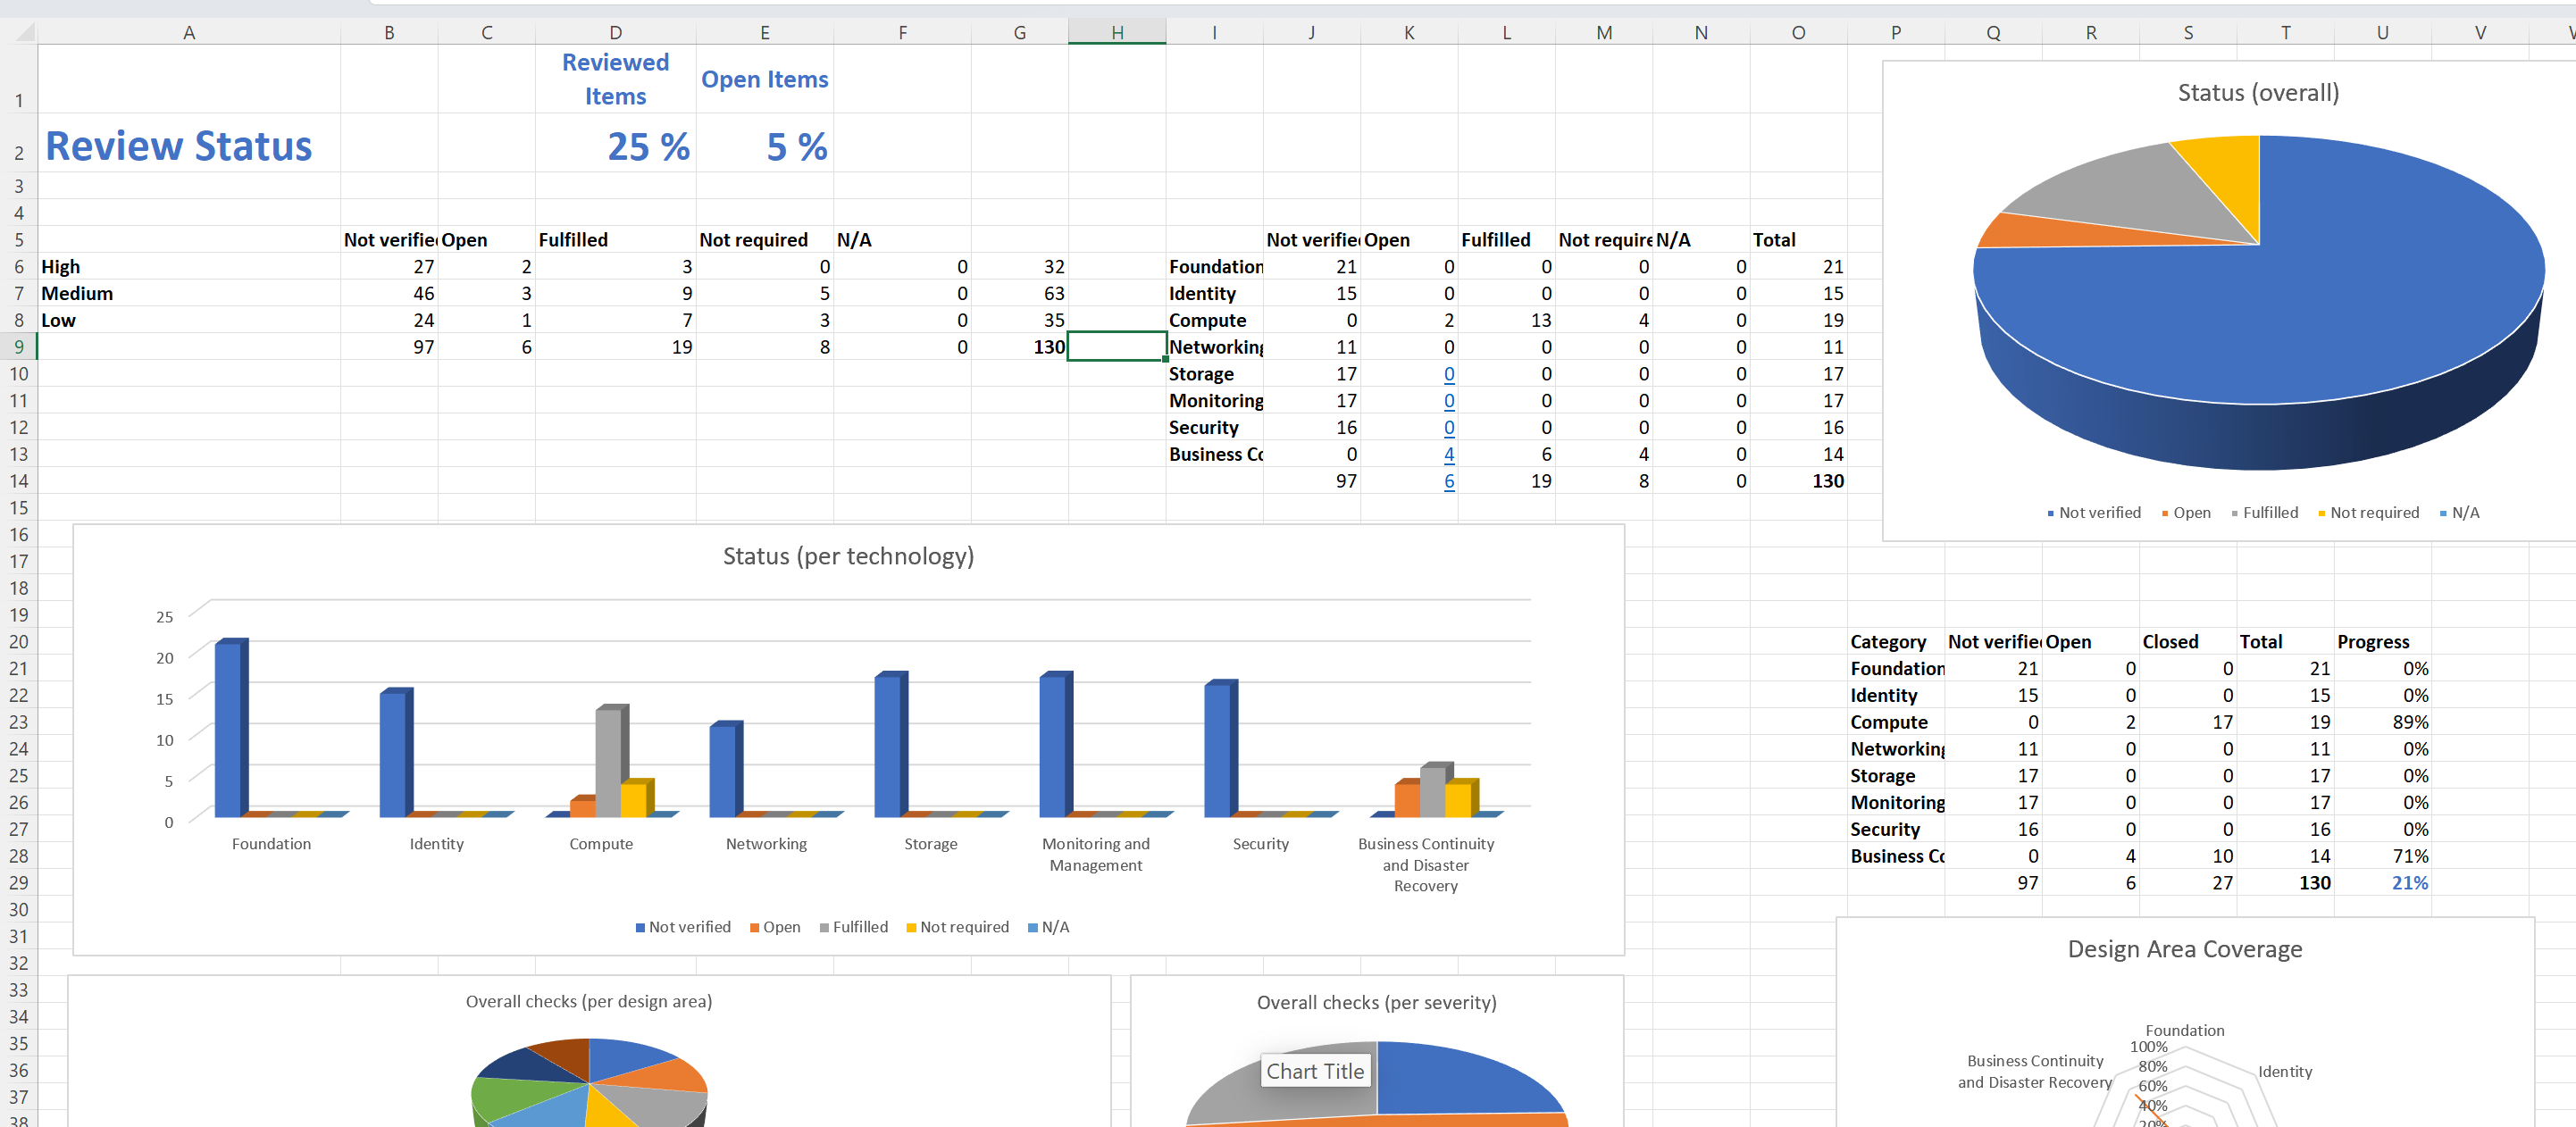
From here, you can see which areas you are strong in and which areas you need to improve.
I didn't fill in the whole checklist in my above demo, but once you complete the checklist, you will then see the entire picture.
Conclusion
The Azure Checklist is a handy way of ensuring that you consider all of the required areas for the technology you are looking to architect. It also serves as a great way of tracking the design of the Azure resource through to the implementation. E.g. for AVD, you may not have planned to host Personal Pools across Availability Zones, a recommendation within the Business Continuity category.
Azure Checklists are one of those Microsoft tools that isn't easy to find, but once you find it, you will use it time after time!